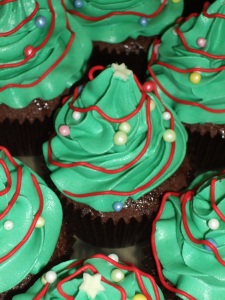
These mini cookie Christmas Trees make a fabulous table gift. I like to make the vanilla cookies with green icing and gingerbread cookies with white icing.
Cookie Dough
- 225 g plain flour
- 110 g caster sugar
- 110 g butter
- 1 medium egg
- 5 ml vanilla extract
- 6 or 7 concentric circle cutters (plain or fluted, it doesn’t matter)
Royal Icing
- 1 kg icing sugar
- 2 tbs meri-white meringue powder (or other powdered egg white)
- 150 ml cooled, boiled water (plus more for thinning the icing later)
- green food colouring (preferably a paste colour)
To Decorate
- 3″ single thick cake boards – one per cookie Christmas tree
- mini smarties
- magic stars
- dragées etc
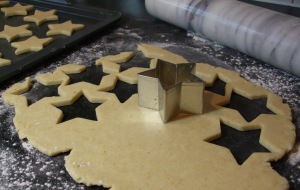
First make the cookie dough. Whizz the flour, butter and caster sugar in a food processor until it resembles fine breadcrumbs. Add the egg and vanilla extract and blend until the mixture forms a ball of dough. Wrap the dough in clingfilm and chill for at least an hour.
Once chilled, roll out the dough to 5mm thick and cut out your circles. You’ll need about 6 different sized circles per tree, depending on how big you want them to be, but make sure you start with the smallest cutter size and gradually get bigger.
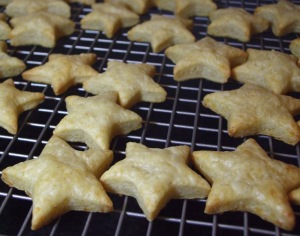
Bake the cookies at 160°C for about 8-10 minutes, turning half way. Leave to cool on a wire rack whilst you make the royal icing.
Put the egg white powder into a mixing bowl and add a tablespoon of water. Mix to a paste, then very gradually add the rest of the water, mixing carefully. If you take a bit of time now and prevent any little lumps forming you’ll avoid blocked piping tubes later on. Add the icing sugar and mix in thoroughly. Now, carry on mixing (about 5 minutes if using stand mixer) until your icing is a really bright white colour and has reached stiff peak consistency.
Add a teaspoon or so of cooled boiled water until your icing reaches soft peak consistency. Add enough green food colouring to get a nice, bright Christmas tree colour.
Spoon some icing into a piping bag fitted with a number 2 writing tube until it’s about one-third full. If you don’t have any piping tubes then snip the very tip off the bag. Carefully outline all the circles with icing and leave to dry for about 10 minutes whilst you thin the icing. You can tell I was icing these well past midnight – when I came to take the photos they’re as wobbly as I think I’ve ever done!
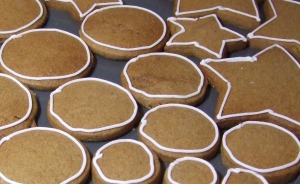
Outlining the cookies
Remove about half the icing and place in an airtight container. You’ll need this later on. GRADUALLY add more water to the remaining icing until it reaches flooding consistency. I do this using a syringe, adding no more than 5 ml at a time. To test the consistency, drizzle a teaspoon of the icing into a figure of 8 on the surface.
Count how long it takes for the shape of the 8 to disappear leaving a completely flat surface. When this happens on the count of 10 you have the correct consistency.
If it takes longer than the count of 10 continue adding more water GRADUALLY. If the figure of 8 disappears before you’ve counted 10 it’s not a disaster – the icing will just take a lot longer to dry.
Once you’ve got the correct flooding consistency half fill a piping bag fitted with a number 3 writing tube, or alternatively pour into a plastic squeeze bottle. Fill the outlined cookies with icing and leave to dry overnight.
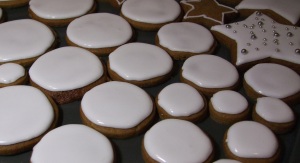
Flooding the cookies
If you’re short of time, you can dry the cookies off in a very low oven (50°C) for an hour or so. Once the icing is dry and set you can stack the cookies.
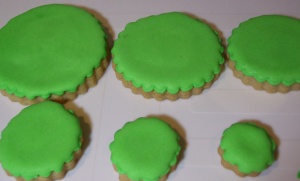
Dried cookies ready to stack
Using the saved icing, fill a piping bag fitted with a number 2 writing tube to one-third full. Pipe a dot of icing onto your cake card and place the largest cookie onto the icing dot. Now, pipe lines up and down the edge of the cookie, to look like the branches of the tree.
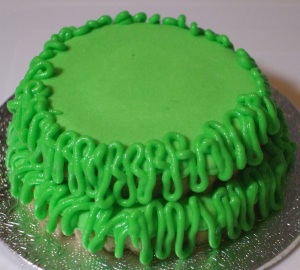
Part finished cookie Christmas tree
Pipe a dot onto the top of the cookie, add the next sized cookie and pipe all around the edge again. Continue stacking the cookies, finishing with piping in a swirl to cover the top cookie. Working quickly, dot mini smarties, dragées etc around the tree to look like lights and baubles and top with a chocolate star.
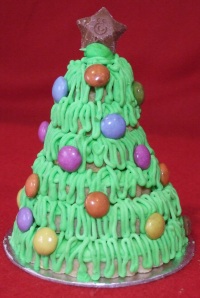
Mini Cookie Christmas Tree
Leave to dry for a couple of hours.
You can also make bigger versions of the Cookie Christmas Tree.
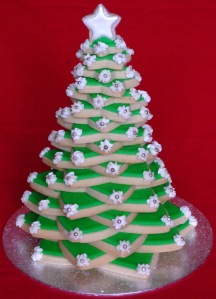
Cookie Christmas Tree with dragées
If you’re happier baking than arranging flowers then I definitely recommend making one as a Christmas Day table centrepiece – great to look at and you get to eat it too!
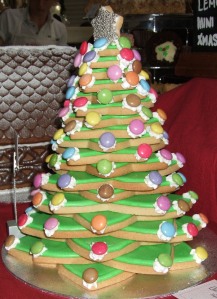
Cookie Christmas Tree with smarties